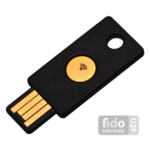
How to set up your YubiKey NEO

Recently, i bought a YubiKey NEO (affliate link) with the goal to improve the security and comfort using platforms like GitHub, GitLab – or other tools working with GPG encryption etc. Here i will show you the steps for getting your YubiKey NEO running with your Linux (in my case Ubuntu) system.
Initialize your YubiKey NEO and create a new GPG key
Plug your YubiKey NEO to your system and go to card edit and admin mode:
$ gpg2 --card-edit
gpg/card> admin
Important: Before continuing, you should set up some general settings (see help command for a list of possible tasks): name, lang, sex and passwd. This prevents your key from unauthorized access and usage.
Now it’s time to generate your key:
gpg/card> generate
Fill in all required fields and wait until your key is created. When finished, you should send your public key to a keyserver to have it available for others – and for the fetch command used later in this blog post. Alternatively, you can make a backup of your public key at your own without publishing it – this does not expose your email addresses to other people.
$ gpg2 --send-keys <KEY>
Export SSH authentication key
You can also use this key pair for SSH authentication. You simply have to export a SSH public key:
gpg2 --export-ssh-key <KEY>
Use your YubiKey NEO for signing on other systems
If you want to use your YubiKey NEO to sign data, you have to bring a stub key into your local key collection. This stub key is a reference to your smart card. This is how you can download this stub key to your computer when your YubiKey NEO is plugged:
$ gpg2 --card-edit
gpg/card> fetch
This does only work if you have send your public key to a keyserver! gpg2 can neither export the public nor the private part or your key pair from a smart card (your YubiKey NEO in this case).
Get my key!
Of course i’m using my YubiKey NEO for my own encryption and validation needs. So if you are interested in sending me encrypted data or checking stuff signed by me, you can use my Public PGP Key for that.
